
Index:
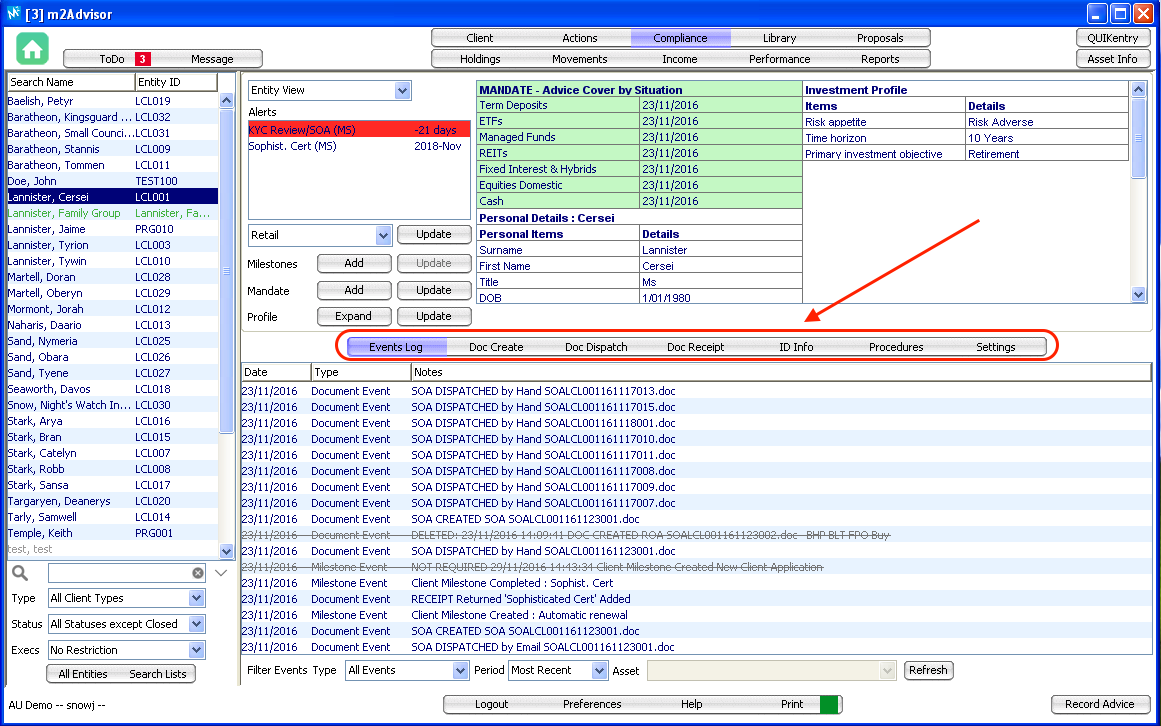
Events Logs
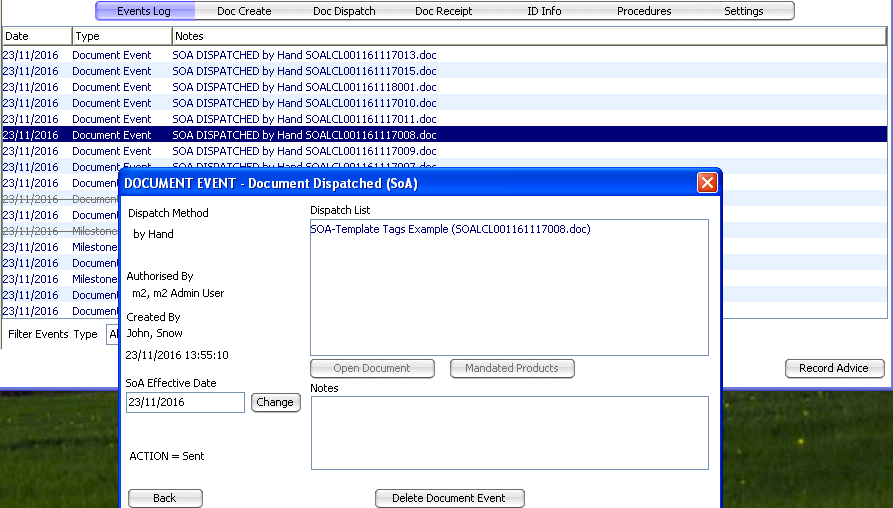
This is where all compliance actions are recorded. This includes Documents created, receipted, sent and Milestones created and completed.
You can double click on the logs to view the details.
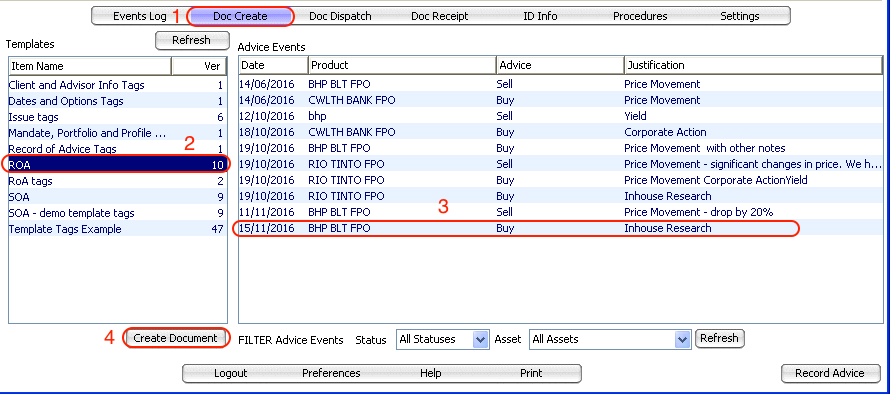
Doc Create
You can generate a document using a document template by following the steps below:
*Note that for "non-Advice Event" documents, you can skip step 3.
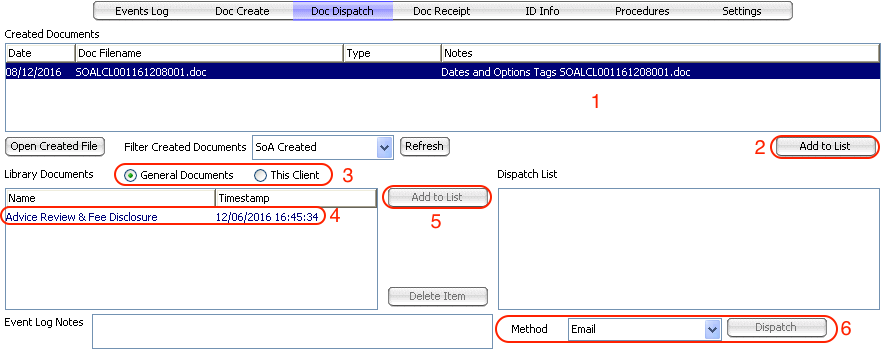
Doc Dispatch
Once a document is generated from 'Doc Create' tab, you can sent that document using this tab.
Steps (please see screenshot below):
1. All documents generated for this client using the 'Doc Create' tab will be listed on the top section. Select the document you would like to send, and
2. Click on "Add to List".
3. You can also add other General or Client documents to the list by toggling between the radio button on the bottom left section.
4. Select a document you want to add to the list
5. Click 'Add to List'
6. Select the method to send the documents and click 'Dispatch'.
This will log the Doc Dispatch actions in the Events Logs section for audit purposes. If you select the 'Email' method, your outlook will pop-up with the following documents attached.
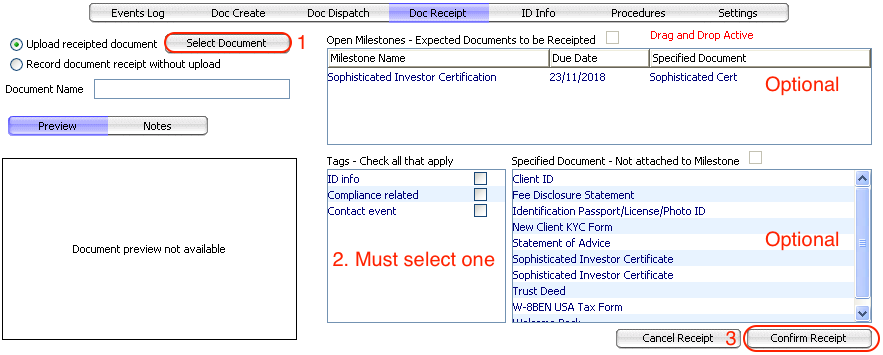
Doc Receipt
This section is the same function as receipting a document from the Library tab.
To receipt a document:
1. Click 'Select Document'
2. Select a Tag
2a. You can also specific if this document relates to a Milestone Task and is a Specified Document. (This is optional)
3. Click 'Confirm Receipt'
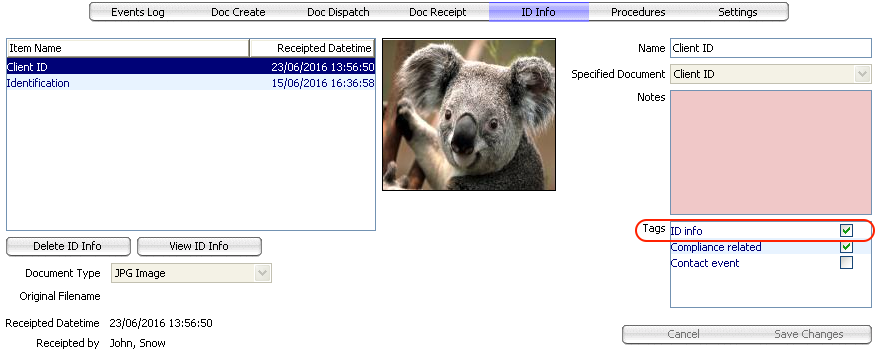
ID Info
The ID Info tab is a quick way for your to view the client ID documents.
All documents with the 'ID Info' document tag will be listed here.
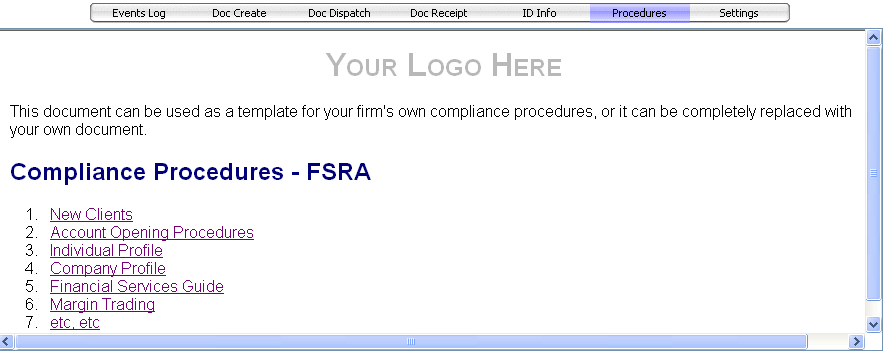
Procedures
You can upload your firm's compliance procedures (in .htm format) into m2Advisor and it will be displayed in this tab for easy reference.
Settings
This is the customisable Document Template Tags that you can set that are client specific.
When you are preparing a Document Template, you can create tags that are client specific.
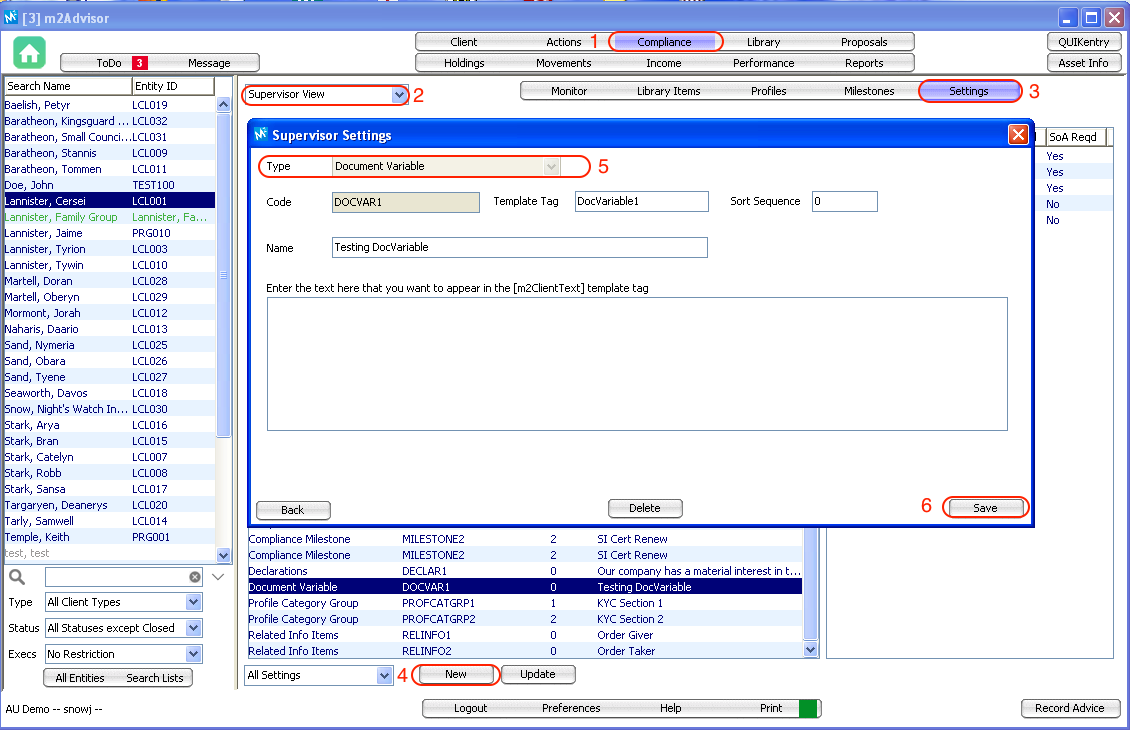
Create a client specific Document Template Tag:
1. Go to Compliance
2. Select 'Supervisor View'
3. Go to 'Settings' tab
4. Click 'New'
5. Select Type as "Document Variable" and fill in the other fields.
6. Click 'Save'
This will activate the client specific document template tag [m2ClientText].
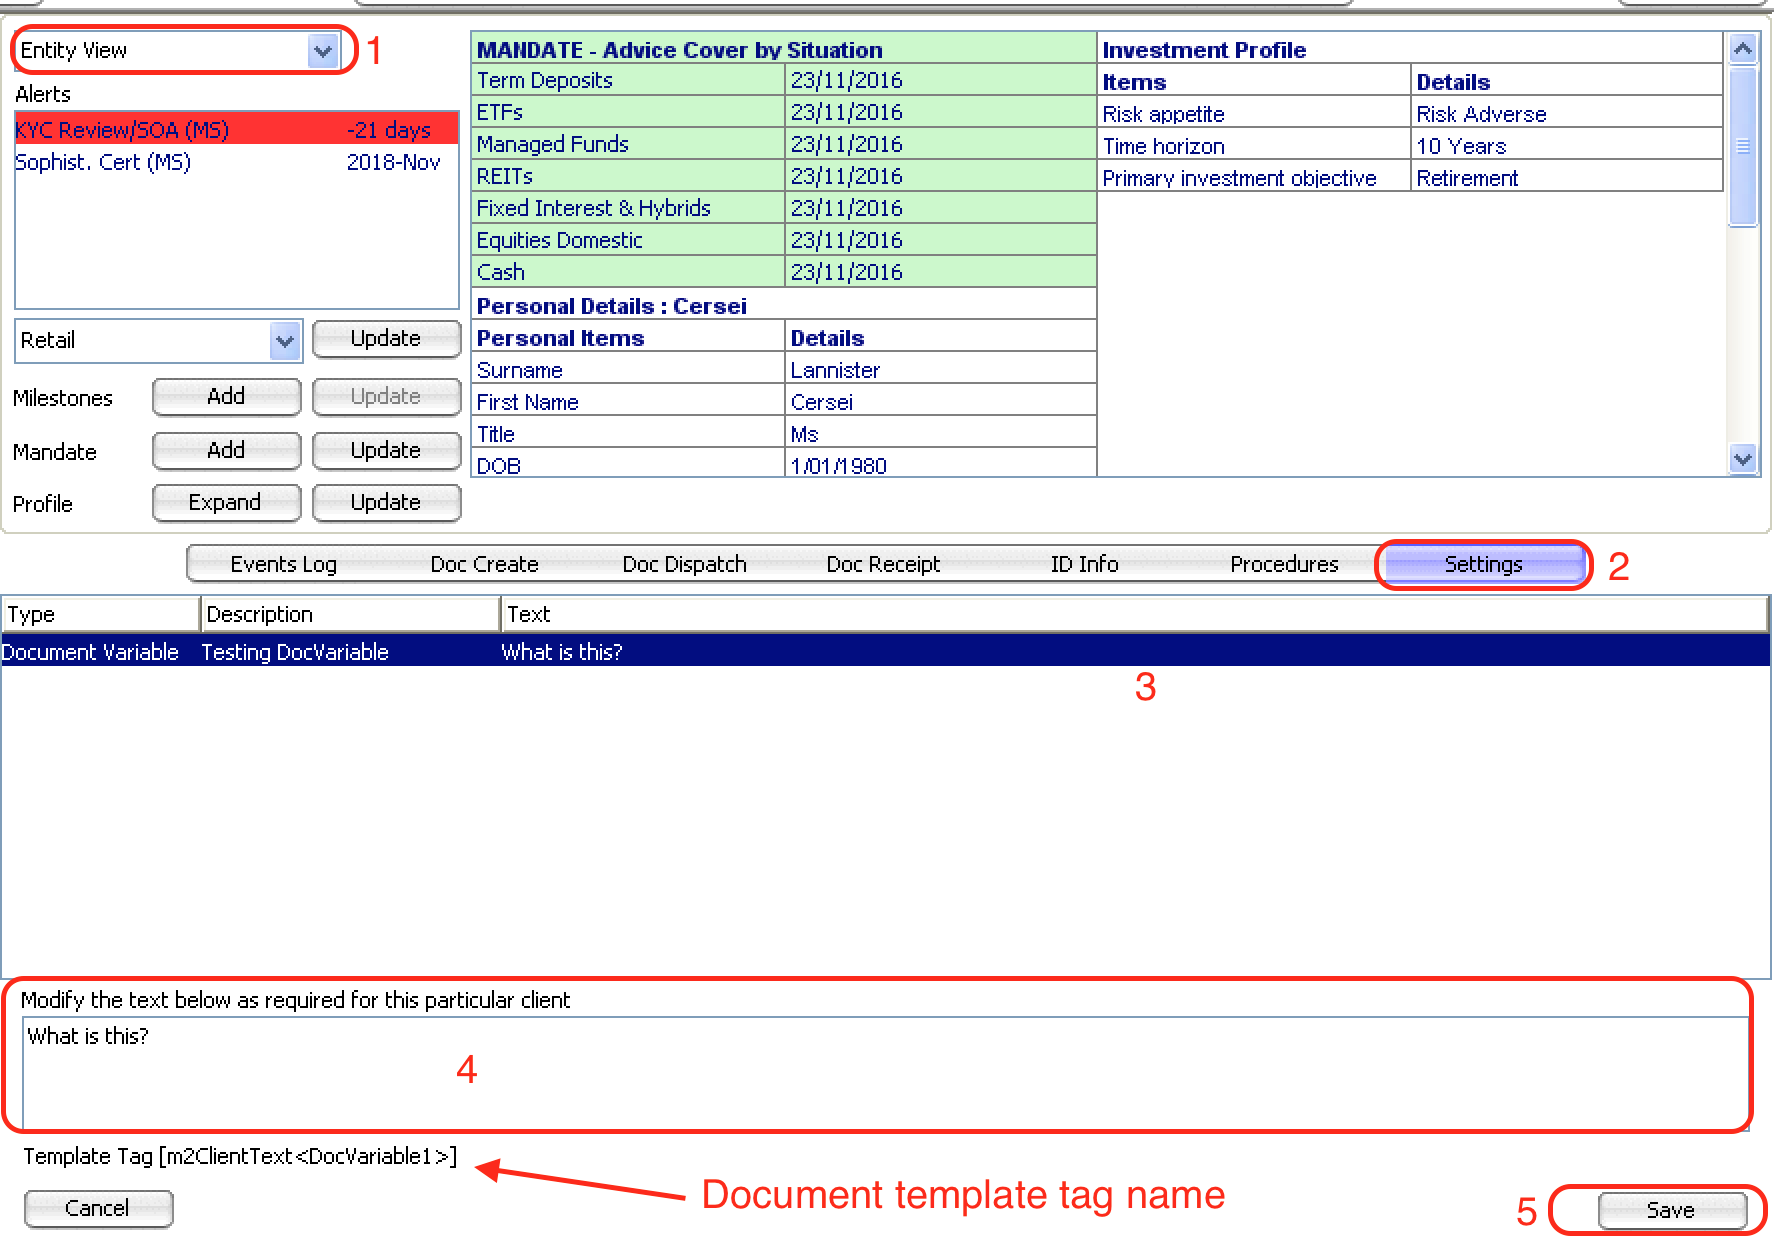
To update this Document Template Tag text:
1. Select 'Entity View'
2. Go to Settings tab
3. Select the Document Variable you have just created
4. Modify the text below for this client
5. Click Save
Use the Document Template Tag Name (m2ClientText<DocVariable1>) shown below in your template documents and it will generate the text you have entered in this text box.
Comments
0 comments
Please sign in to leave a comment.