
Index:
Adding an Entity
1. Go to the Client tab
2. Select the "+" icon shown below

3. Fill in the client fields:
Entity - there are 3 entity types:
- Portfolio Client - a normal portfolio client.
- Family Group - a set of portfolios that is group together (please see Family Groups).
- Other Entity - a prospect client.
Status - there are 4 different statuses that an entity can be in:
- Active - when an entity is a full client of the company.
- Closed - when an entity is no longer a client of the company.
- Pending Activation - when an entity is still waiting on some procedure to be completed before it can be activated.
- Suspended - when an entity can no longer trade but still receiving feeds.
Client ID - this ID can be specified by the company. It could select to use a Pershing ID, their in-house ID or any other ID.
Client Name - name of the entity.
Search Name - search name will be displayed in the 'List of Entities' section. You can filter this list by Alphabetical order by clicking on the 'Search Name' column.
- E.g if you structure your search name like "<Surname>, <Name>" then when sorting your List of Entities, you can easily identify entities with the same surname group together.
Access Control - specified who can view this entity
- Review - everyone can view this entity (according to the Advisor rules - please refer to Shared Clients)
- Private - only the creator can view this entity
Executive - is the advisor who is responsible for this client.
Branch Office - this drop-down list can be customised via the Home View > System Admin > Settings.
Department - this drop-down list can be customised via the Home View > System Admin > Settings.
Client Type - you can define the entity type here (e.g. Company, Trust, Individual etc.)
Compliance – you can select the compliance class that applies to the entity (e.g. Wholesale, Retail etc). Once a compliance class is chosen then all compliance milestones for that compliance class will be applied to this entity.
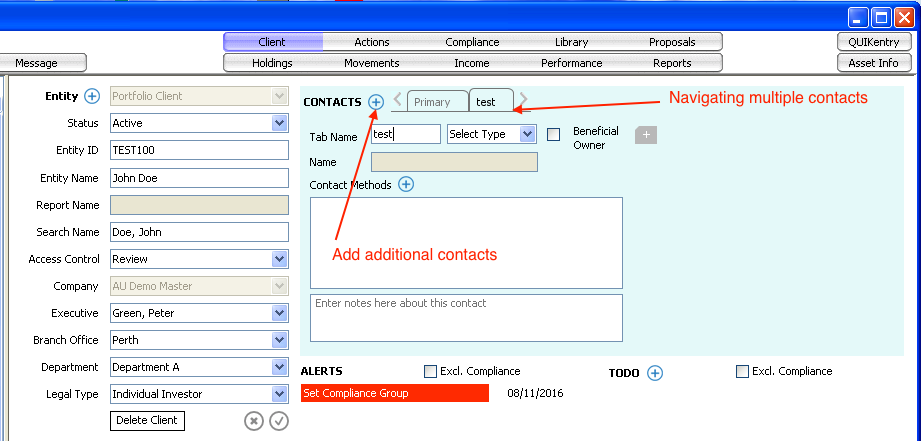
Adding a Primary Contact
Once a new Entity is saved, the Contacts section will be activated.
1. You can change the tab name to another name if you wish
2. You must select a "Type" to specific if the contact information is a Person (e.g. the client) or an Organisation (e.g. a charity organisation)
3. Click on the 'Beneficial Owner' check list to identify
4. Click on the "+" button next to "Contact Methods" to add contact information like phone number, emails etc.

Adding Additional Contacts
Comments
0 comments
Please sign in to leave a comment.